Showing posts with label Number of Years. Show all posts

Monday, January 10, 2022

Happy 70th Birthday!

Hello and welcome back! This week, one of my husband's cousins is turning 70! We are all getting to be a certain age, so it's definitely worth a special card.

I was inspired by the color challenge at TGIF Challenges and the sketch and celebration challenge at Try Stampin on Tuesday.


Pretty much everything on this card is retired, but I might as well use my stash!


 She lives nearby, so I haven't decided yet whether to mail this or hand deliver it. I'm leaning toward the latter.

Thanks for stopping by, and happy stamping!

--Cindi


Supplies used (all Stampin' Up!):

Stamp sets - Number of Years, In Your Words (inside sentiment), Balloon Celebration (on envelope)

Paper - Basic White Thick Cardstock; Basic White, Night of Navy, and Blushing Bride Cardstock; Gold and Blushing Bride Glimmer Paper; Subtles Patterns DSP

Ink - Night of Navy, Blushing Bride

Accessories - Blushing Bride Bakers Twine

Tools - Big Shot, Layering Ovals Framelits (inside card), Layering Circles Framelits, Large Numbers Framelits, Well Written Framelits, Balloon Bouquet Punch, Adhesive Sheets, Multipurpose Liquid Glue, Stampin' Dimensionals, Mini Stampin' Dimensionals, Mini Glue Dots

Sunday, August 1, 2021

Card of the Day - Mixed Drink Birthday

Hello and welcome back! Today's card is for a friend who is having a special birthday - one that ends in a 5 (and makes her eligible for Medicare)! She is traveling with her family now but I'll be taking her out for margaritas when she returns.

I decided to use the left hand column - fruit, drink, sparkle - on this week's board at the Tic Tac Toe Challenge.


The lime slices on the glass rims take care of the fruit, margaritas - check, and the layer of silver glimmer paper and the metallic ribbon cover the sparkle.


I'm also entering this card in the Inkspirational Challenge this week.


Thanks for stopping by, and happy stamping!

--Cindi


Supplies used (all Stampin' Up!):

Stamp sets - Mixed Drinks, Number of Years (inside sentiment)

Paper - Basic White Thick Cardstock; Whisper White and Bermuda Bay Cardstock; Bubbles and Fizz DSP; Silver Glimmer Paper

Ink - Memento Tuxedo Black, Lemon Lime Twist, Bermuda Bay

Accessories - Silver Metallic Ribbon

Tools - Big Shot, Layering Circles Framelits, Multipurpose Liquid Glue, Stampin' Dimensionals, Mini Glue Dots

Wednesday, November 4, 2020

Card of the Day - Special Birthday

Hello and welcome back! This is my third post of the day, since I've been hanging out in my stamp studio to avoid the news. I posted my card-sending accountability chart on Facebook the other day and asked my friends to let me know if there were any upcoming birthdays or anniversaries that I could add to my list.


Well, one of my friends told me that she had just celebrated a special birthday, so I obviously needed to make a special card for her!


I made one similar to this a few years ago, but never blogged it, so I'm making up for it now! This will be hand delivered, so I was able to go a bit crazy with the bow and embellishment. I miss these colors.


And, as it turns out, the challenge this week at Retro Rubber is Anything Goes! The stamp sets I used were from 2016.


Thanks for stopping by, and have a great day!

--Cindi


Supplies used (all Stampin' Up!):

Stamp sets - Something to Say, Number of Years
Paper - Pistachio Pudding, Crisp Canteloupe, and Whisper White Cardstock; Gold Glimmer Paper, Gold Soiree Specialty DSP
Ink - Watermelon Wonder
Accessories - Watermelon Wonder 1" Dotted Lace Trim, In Color Boutique Details
Tools - Big Shot, Large Numbers Framelits, Multipurpose Liquid Glue, Stampin' Dimensionals, Mini Glue Dots

Friday, April 17, 2020

More birthdays!

Hello and welcome back! Well, the first part of tax season is over, so it's time to start making more birthday cards. I've been finishing up some kits in my limited spare time to tide me over, but I need to get my mojo working again!

Using a sketch as inspiration, here's what I came up with today:


I loved this Birthday Bouquet DSP when it came out about 4 years ago, and like every good paper crafter, it's been in my stash ever since. I think I've only used it a couple of times. If I were to make this card again (which I might), I'd probably use the Mossy Meadow as the anchor layer to make the DSP stand out a bit more.

I also made a slightly different version for a young lady from my church choir who celebrated her birthday last week.


These cards were inspired by the sketch at Sunday Stamps Challenge.


That's it for now. Back to the stamp studio!

Thanks for stopping by, and have a great day!

--Cindi


Supplies used (all Stampin' Up!):

Stamp sets -- Number of Years (retired), Banners for You (retired), Beautiful Bouquet
Paper -- Whisper White Thick Cardstock; Blushing Bride, Pool Party, Mossy Meadow, and Whisper White Cardstock; Birthday Bouquet DSP (retired)
Ink - Mossy Meadow, Pool Party, Blushing Bride
Accessories - Mossy Meadow 3/8" stitched satin ribbon (retired)
Tools - Big Shot, Layering Circles Framelits, Stitched Shapes Framelits, Large Numbers Framelits (retired), Bunch of Banners Framelits (retired), Timeless Type Sizzlits (retired), Multipurpose Liquid Glue, SNAIL, Stampin' Dimensionals

Saturday, June 30, 2018

Baby's First Birthday!

Hello and welcome back! Today's card is for my great-niece's first birthday! She spent the week with her mom and dad at the beach - the pictures on Facebook are too cute! :)


Lots of things in her nursery are dinosaur themed - her dad even sculpted a dino in the snow this winter! I borrowed the stamp set from a friend and used lots of retired stuff from my stash to make this - no worries; there's still a lot left! 

I was inspired by a card made by Erica Cerwin, but I changed up a few things. I wanted to use the apatosaurus but it was too big for a standard card, so I chose the stegosaurus instead. I changed the base to a landscape orientation to fit the wider stamps. The window was cut with the retired Ovals Collection framelits and I used the retired extra-large oval punch and Timeless Type Sizzlits for the sentiment on the front.


The tricky part was trying to figure out where to add sentiments on the inside without having them show through the window. I added the cardstock on the inside front to cover the edges of the window, so that gave me a little extra room.


Last year I made a framed art piece and a card when she was born, and also a card for her baby shower which you can see HERE and HERE.

I hope J (and her mom and dad) will like this card!

Thanks for stopping by, and have a great day!

--Cindi


Supplies used (all retired Stampin' Up! unless specified):

Stamp sets - No Bones About It, Number of Years
Paper - Pretty in Pink cardstock, Lap of Luxury DSP, Whisper White and Basic Gray cardstock (current)
Ink - Regal Rose, Basic Gray (current), Jet Black Staz-On (current)
Accessories - Whisper White bakers twine (current), Window Sheets (current)
Tools - Big Shot (current), Ovals Collection Framelits, Extra-Large Oval Punch, Timeless Type Sizzlits, Stampin' Dimensionals (current), Mini Glue Dots (current), Fast Fuse

Tuesday, January 9, 2018

PCC 274 - Foil Frenzy Birthday

Hello and welcome back! Today I've got two cards - the same design, but one is vertical and one is horizontal.


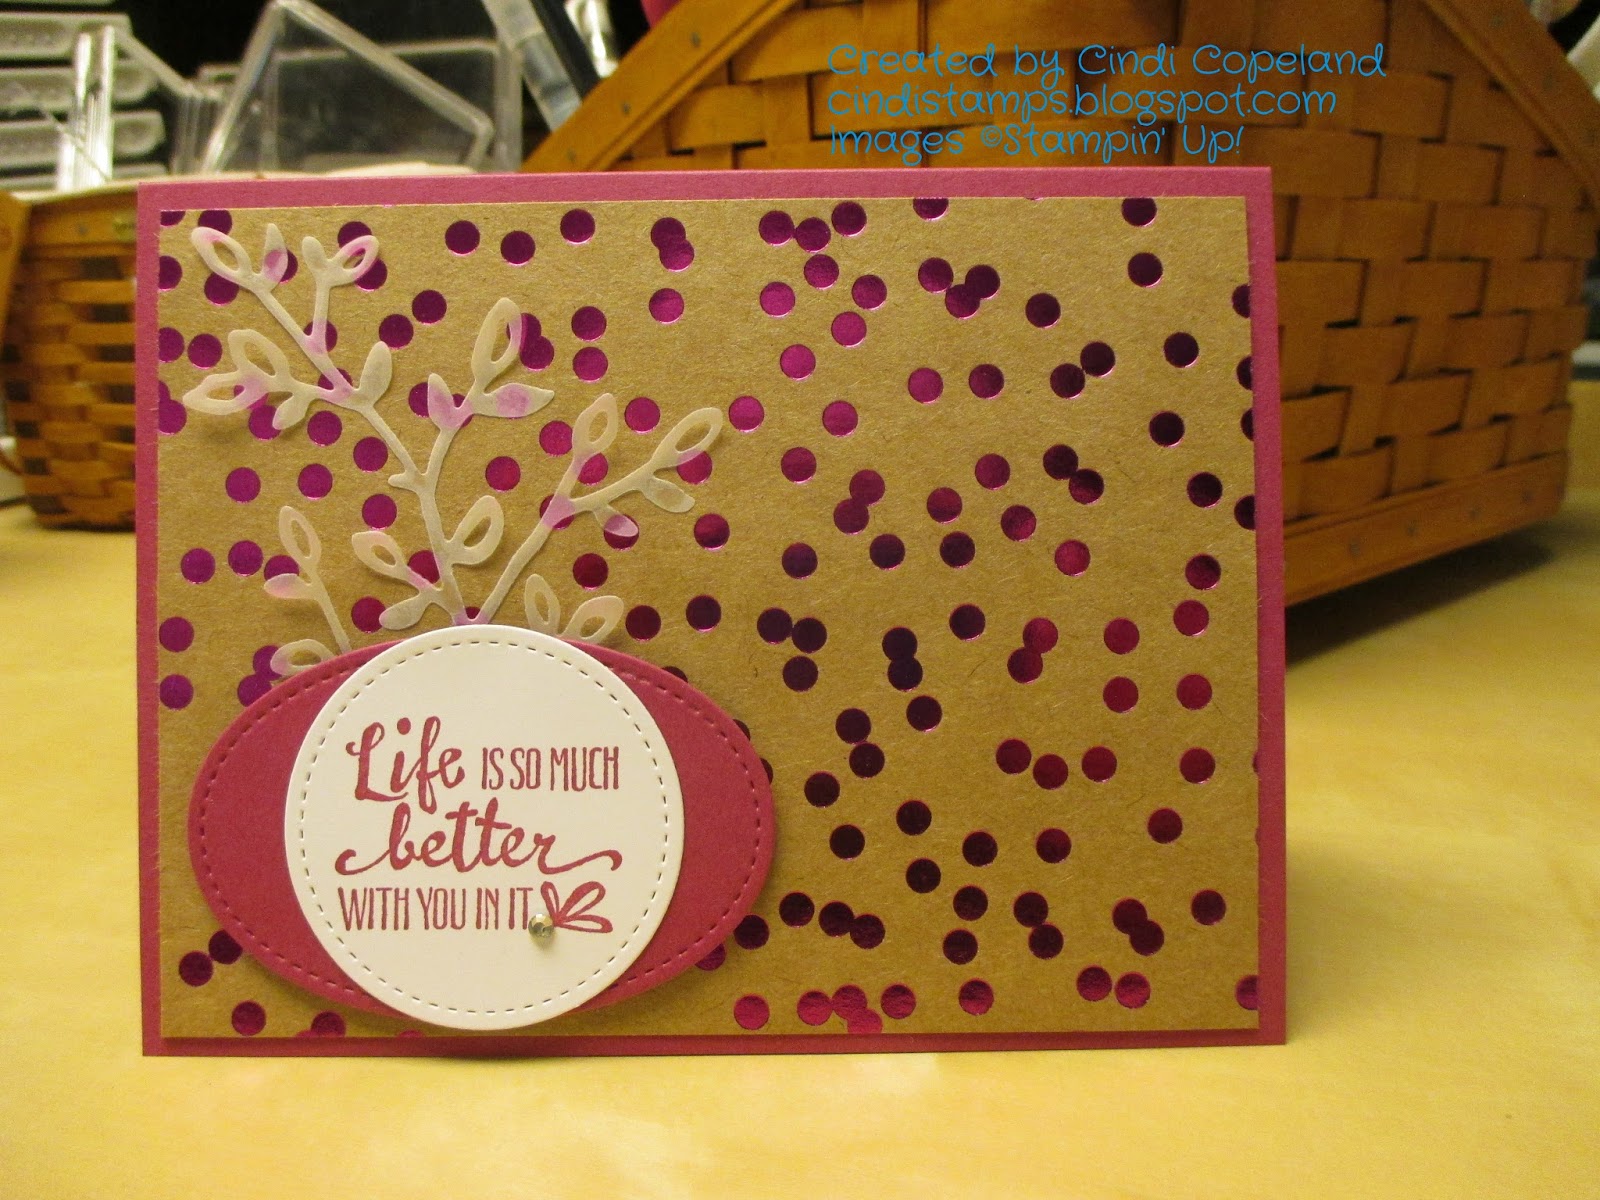
I have two friends celebrating milestone birthdays this week, so I thought it was a perfect opportunity to use this beautiful shiny DSP! I pulled out my new Petals & More Thinlits to cut the branch from Vellum Cardstock and added a sentiment from the new Petal Palette stamp set.

Insides were stamped with the Number of Years stamp set.


This card is for the sketch challenge at the Paper Craft Crew.


Thanks for stopping by, and have a great day!

--Cindi


Supplies used:

Stamp sets - Petal Palette, Number of Years
Paper - Berry Burst and Whisper White Cardstock, Foil Frenzy Specialty DSP, Vellum Cardstock
Ink - Berry Burst, Powder Pink
Accessories - Basic Rhinestone Jewels
Tools - Big Shot, Petals & More Thinlits, Stitched Shapes Framelits, SNAIL, Fine-Tip Glue Pen, Stampin' Dimensionals

Thursday, October 26, 2017

An Unusual Birthday Bouquet!

Hello and welcome back! Today's post is not stamping related, but I thought you might enjoy seeing the project I created for a dear friend's 60th birthday. She is addicted to Post-It Notes, and I've had this idea in my head for several months to create some kind of arrangement that would include 60 note pads. I tried looking on Pinterest, because I was sure someone else must have done something like this, but alas, there was nothing. So I came up with this myself, with some thoughts thrown in by another friend who is a floral arranging genius!

Here's a picture of the finished product, with instructions to follow:


My original plan was a standard bouquet, but that quickly went out the window when I realized I'd need 30 flowers and they'd be really big! This arrangement has 21 "flowers" made with 2 note pads each; the other 18 pads are small ones arranged around the edge of the container.

I purchased the container at a local home and garden store, then hit up a big box craft store for the foam and floral picks, a warehouse store for the note pads, a dollar store for the moss, and my craft stash for the rubber bands, ribbon, and cardstock.

Here's the empty container:


I used some legal size printer paper to create a pattern of the bottom of the container, then traced it onto the foam and cut it out with a serrated knife. Once I got that one to fit, I made another pattern (since the container sides flare out) and cut out the second piece.


I ran some beads of hot glue on the bottom of the container to hold the first piece of foam, then added glue on top of that to hold the second piece.

Next, it was time to make the "flowers." I added a line of hot glue diagonally down the center of a note pad to hold the floral pick.


For the pad on the other side, I added the glue down the center, plus a dot on each of the opposing corners to hold the pads together.


And here's what it looked like after gluing.


I also discovered that while the colored super sticky pads stayed together, the plain yellow ones did not. As soon as I held up the stick, the pad came off. So, I pulled out my trusty rubber band ball and added the bands to hold the pads together. At least I had some colored ones that coordinated with the pads! 

Here's what the stems looked like all lined up and ready to become "flowers"!


I added the smaller pads around the edge of the container to form a border, but did not glue them in. I wanted my friend to be able to use them. They didn't quite reach all the way around, but that's okay.


To create the "flowers," I used my retired Stampin' Up! Floral Frames dies to cut flowers from my stash of cardstock. I stuck them onto the pads using removable Glue Dots, so they'll come off with no problem when it's time to use the note pads.


Before adding the stems to the container, I used several different green ribbons to tie bows onto the stems to look like leaves. 


The arranging was the tricky part. Because the pads are so large, I couldn't get them too close together, and my container was only 15 inches wide. The center row has 7 stems, and the pads are turned so they would all fit. There are 4 stems in each of the middle rows and 3 stems in each of the outer rows. I placed the center row first, then added a couple at a time on the sides, stuffing the moss as I went. The moss is not glued in, just placed on top of the foam and around the stems. You can see on the picture above that I had added some tulle around the outside of the container. I thought it might pretty it up, but once I got it on, I didn't really like the way it looked, so I took it off.


If I were to do this again, I'd probably use fewer note pads, and I think I'd add some weight to the bottom of the container. As it is, this is very top heavy, so I hope it doesn't get moved around too much. When it's time to use the note pads, my friend can just pull out a stem, remove the die cut flowers and rubber bands and pull the pads off the stick. Unfortunately, the backings will stay, but the pads are still usable.

And of course to go along with the gift, I had to add a card. Since this friend is also the music director at my church, I wanted something with a musical theme. For that, Pinterest was very helpful. I finally decided on this card:


It's virtually an exact copy of one I found here created by Jen Arkfeld. There are a couple of tweaks - instead of using an inked spritzer to create the dots, I used a stamp from the retired Gorgeous Grunge set, and instead of candy dots, I added some rhinestones. The large one on the sentiment piece covers up a blotch of Versamark ink (oops!), and the ones in the lower right corner cover up the Stampin' Up! copyright logo that used to appear on all our Designer Series Paper (that I did not notice when I was cutting it). As we like to say, "There are no mistakes, just opportunities for embellishment!"


Jen Arkfeld's blog post contains a video, so if you would like to make this card, you can go to her post here to watch the video. Thank you, Jen, for the inspiration!

My friend, who is also named Jen (what a coincidence!), was very excited to receive this gift! When she posted it on Facebook, she hinted that this was a week's supply of Post-It Notes - I hope they last longer than that! :)

Thanks for stopping by, and have a great day!

--Cindi


Supplies used for the card (all Stampin' Up!):

Stamp sets - Another Great Year (retired), Gorgeous Grunge (retired), Number of Years
Paper - Melon Mambo and Very Vanilla cardstock; Brights Backgrounds and Modern Medley DSP (both retired)
Ink - Versamark, Memento Tuxedo Black, Soft Sky, Tempting Turquoise, Melon Mambo Stampin' Write marker
Accessories - Basic Rhinestones, Black Embossing Powder
Tools - Paper Snips, Heat Tool, SNAIL, Stampin' Dimensionals

Saturday, January 28, 2017

A Special Birthday Card

Hello and welcome back! Today's card is for the challenge at What Will You Stamp?


And here is today's card:


I have a friend who will be celebrating a milestone birthday next week, so I wanted to make a special card for her. She told me recently that she has trouble with the "5" birthdays, but not with the "0" ones; hence, this card.  Here's the inside:


We joked that she could just celebrate the 35th anniversary of her 30th birthday, so that's where I got the idea for this card. To be honest, she seems closer to 30 than to 65! I hope she likes this card, and I hope you all like it too! :)

Thanks for stopping by, and have a great day!

--Cindi


Supplies used (all Stampin' Up!):

Stamp set: Number of Years
Paper: Pool Party, Watermelon Wonder, and Whisper White cardstock; Birthday Bouquet DSP (retired)
Ink: Pool Party, Watermelon Wonder
Accessories: Watermelon Wonder dotted lace ribbon (retired)
Tools: Big Shot, Magnetic Platform, Large Numbers Framelits, Stampin' Dimensionals, SNAIL

Monday, August 22, 2016

Playing Along with Freshly Made Sketches #250

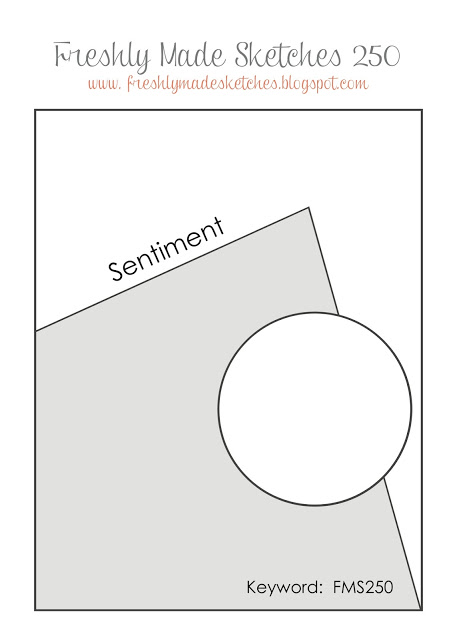
Hello and welcome back! Today's card is for this week's challenge at Freshly Made Sketches
And here is my card:


I needed an anniversary card and a wedding card this week, so I planned on using the same card for both. This is what I originally created:


Which is close to the sketch, but not exactly. :)

Both cards use the Flourish Thinlits, the retired Gold Foil Vellum paper, and a little bit of Clear Wink of Stella on a Very Vanilla card base. The sentiments have been stamped with Versamark and heat embossed with gold embossing powder. The Wink of Stella and embossing didn't show up very well in the photos, but it's there!


I'll be putting these cards in the mail today, and I hope they are appreciated.

Thanks for stopping by, and have a great day!

--Cindi


Supplies used:

Very Vanilla card stock
Gold Foil Vellum paper
Gold Foil paper
Versamark ink
Flourish Thinlits
Gold Stampin' Emboss Powder
Pearls Basic Jewels
Clear Wink of Stella
Mini Glue Dots