Saturday, January 23, 2021

Card of the Day - Paper Blooms Mystery Stamping

 Hello and welcome back! Today I'm sharing a card that I made during my latest upline meeting. She sent us instructions for the pieces to cut and we assembled them during our Zoom meeting. It was kind of funny how many of us chose the same DSP! Here's a photo of the card:


Here are the dimensions for the pieces I cut:

dark folded card base cut 5-1/2" x 8-1/2" (I used Night of Navy)

designer series paper -  3 vertical oriented cut 1" x 3", can be different or all the same pattern (I used Paper Blooms)

accent color that coordinates with your DSP - 2 pieces cut 1" x 5-1/4" (I used Seaside Spray)

white or vanilla cut 3-1/2" x 4"

stamped greeting that is punched or die cut

accent ribbon bow


You can see the placement of each of the elements in the photo above. Instead of an accent bow, I tied the ribbon around the white piece before popping it up on the card front with dimensionals. Since the large piece is popped, I just glued the punched sentiment and tucked it under the ribbon. I added a few champagne rhinestones to some flower centers for some bling. I thought about using the regular rhinestones but I like the contrast better.

We made another card, but I had not prepared my "kit," so I'll share a card with those instructions tomorrow.

Thanks for stopping by, and have a great day!

--Cindi


Supplies used (all Stampin' Up!):

Stamp sets - Happy Thoughts, Flower Shop (envelope)

Paper - Whisper White, Night of Navy, and Seaside Spray cardstock; Paper Blooms DSP

Ink - Night of Navy, Seaside Spray

Accessories - Champagne Rhinestones, Seaside Spray Metallic Ribbon

Tools - Story Label Punch, Multipurpose Liquid Glue, Mini Glue Dots, Stampin' Dimensionals

Monday, January 18, 2021

Card of the Day - Color-Blocked Background

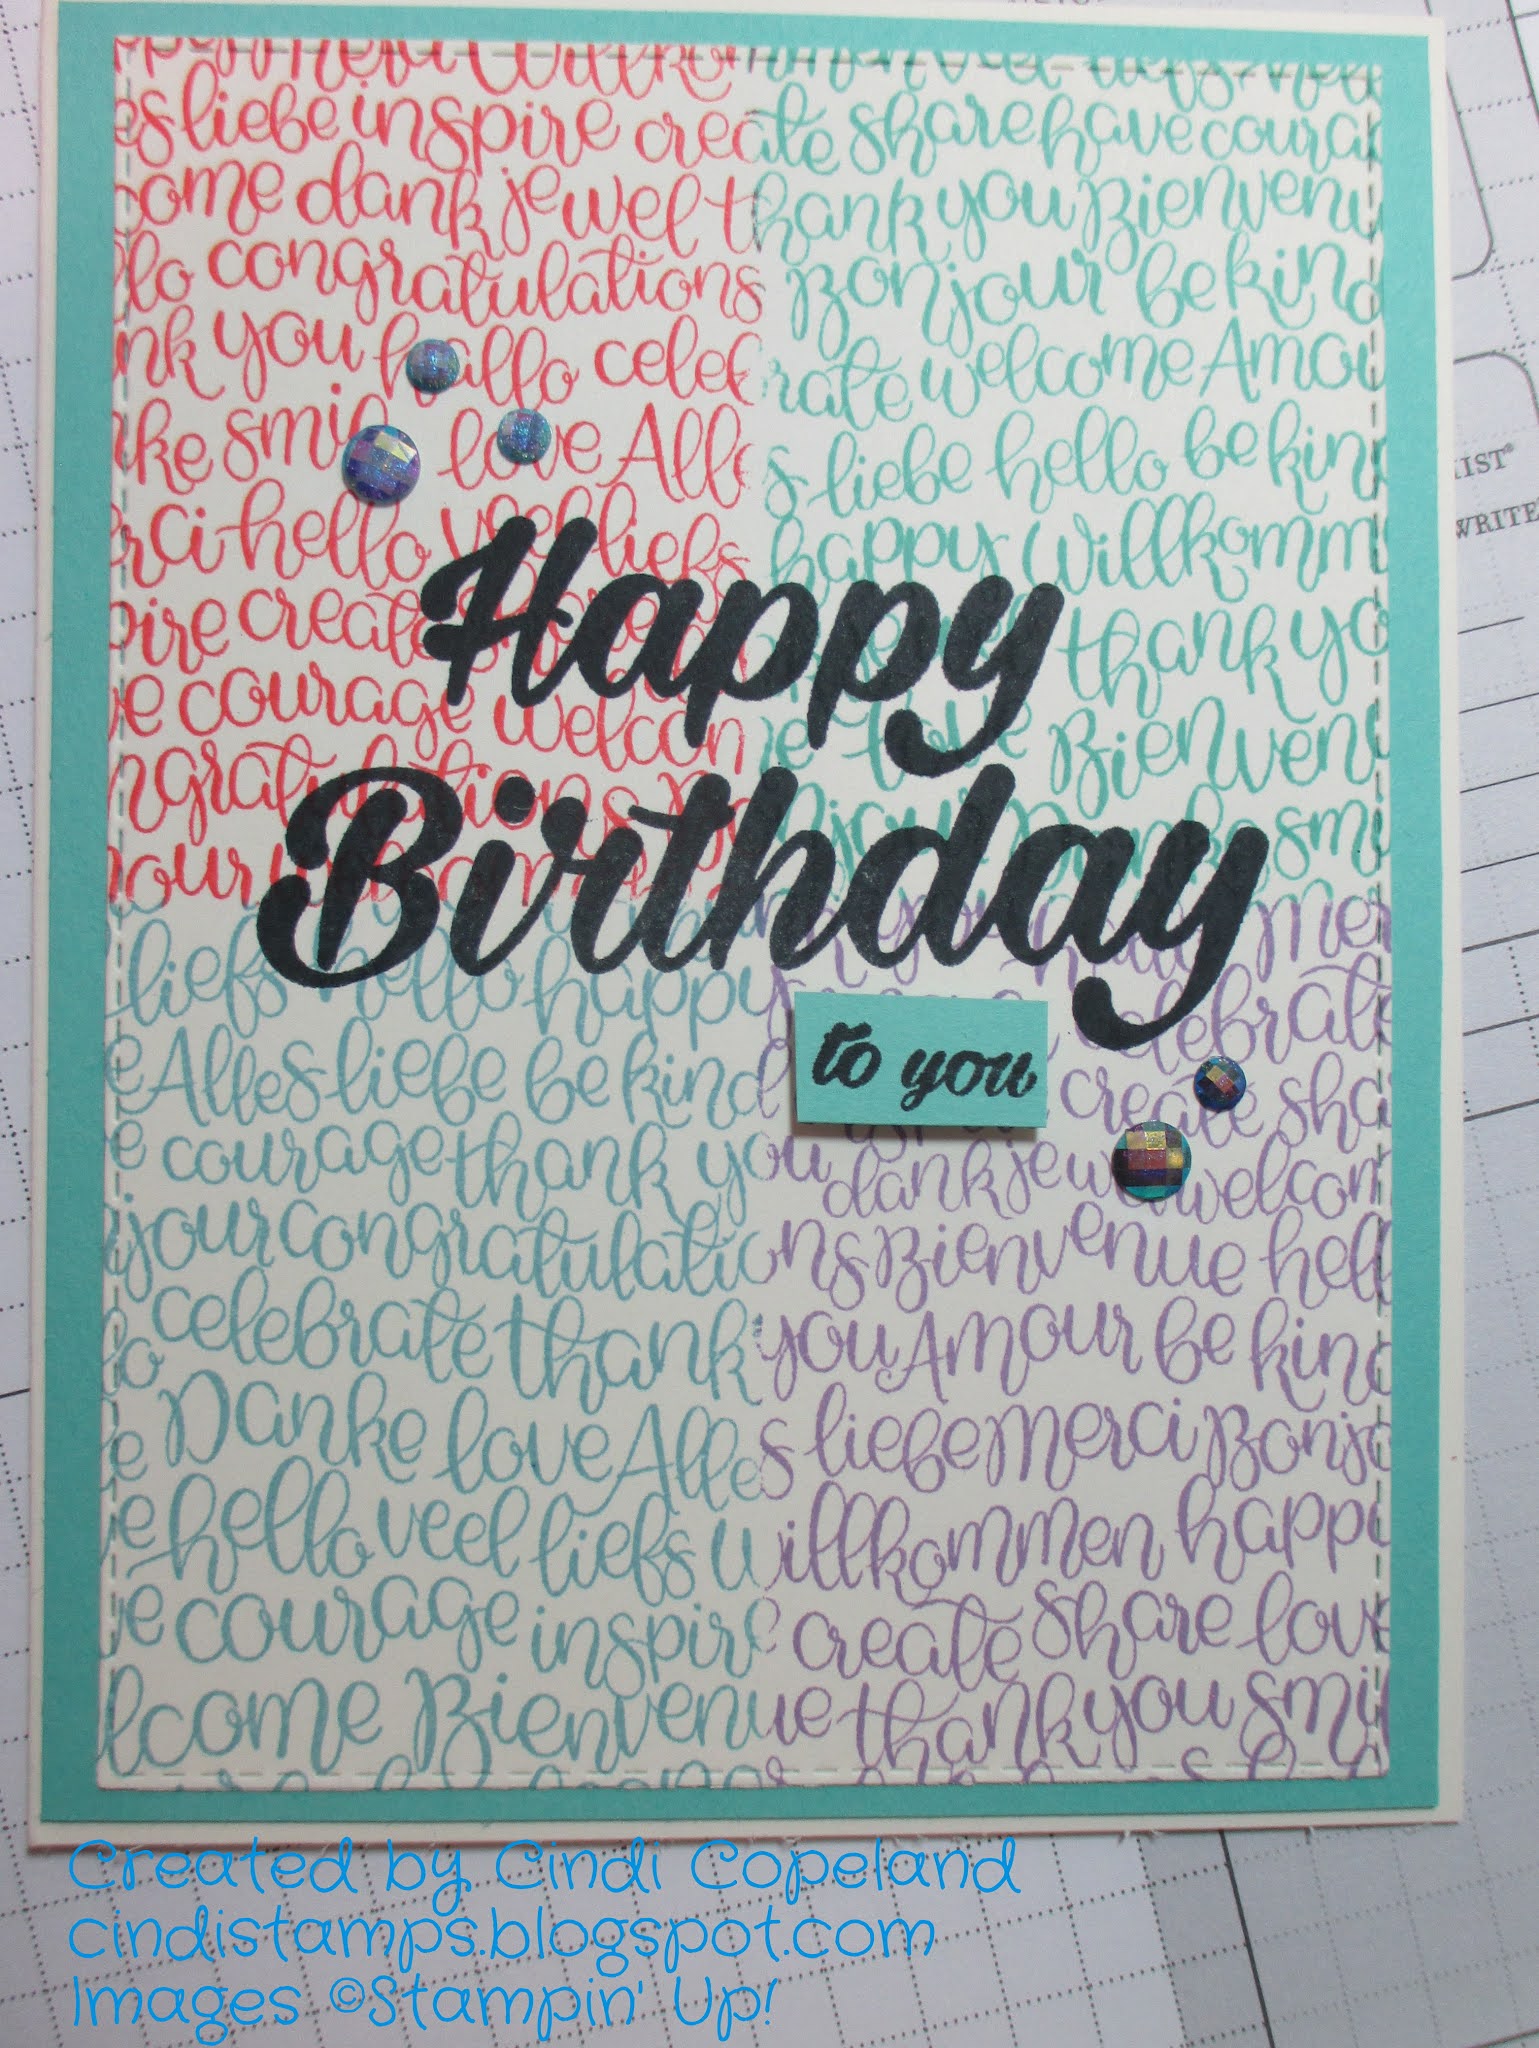
Hello and welcome back! For today's card I decided to try another new technique. I've got lots of photos to explain it (haven't gotten up the nerve to try a video yet!), but first, here's the card.


 I used a background stamp and my Stamparatus to create this color-blocked element. Here are the steps:

1. Cut a piece of cardstock to 4-1/4" x 5-1/2" (a standard card front). Also cut 2 pieces of printer paper to the same dimensions. Then cut each piece of printer paper in half, one horizontally and one vertically.

2. Use a bit of washi tape on the back of the cardstock to hold it down on the Stamparatus platform. Then use more washi to tape down the printer paper, one of the horizontal pieces and one of the vertical pieces. In the photo below, I have already stamped on the right-hand side of the cardstock and am preparing to stamp the left-hand side.


3. Reposition the printer paper to expose one corner of the cardstock at a time. You can see in the photo above that there is a bit of the stamped image exposed. You need to do this because when stamping over the layers, the ink does not get right up to the edge of the printer paper.


4. Here's the stamping on the last corner.


5. You can see in the photo below that there is a small gap between the colors because I didn't position the printer paper with a bit of ink showing. Once the card is finished it won't be as noticeable.


6. I used the largest Stitched Rectangle die to trim the cardstock panel, then used a bold sentiment to stamp over the background in Memento Tuxedo Black.


7. I trimmed a panel of coordinating cardstock to 4-1/8" x 5-3/8" to attach to the card base and trimmed out a small additional stamp for the front. I also added a few adhesive dots for some blingy interest.


I made four of these cards, one with each color. The first one turned out a bit different. Since I wasn't careful about how I placed the masks, there was a much larger gap in the stamping. So I just cut the panel into four pieces to eliminate the stamping gap and adhered them to the colored cardstock. As a result the border is much narrower, but it's hard to tell that it's pieced.


This card was inspired by the product spotlight challenge at TGIF this week.


I hope you'll give this technique a try - it's not too hard at all!

Thanks for stopping by, and have a great day!

--Cindi


Supplies used (all Stampin' Up!):

Stamp sets - Handwritten, Birthday Bright, Approaching Perfection (inside sentiment)

Paper - Very Vanilla Thick Cardstock; Highland Heather, Flirty Flamingo, Balmy Blue, Coastal Cabana, and Very Vanilla Cardstock

Ink - Flirty Flamingo, Balmy Blue, Coastal Cabana, Highland Heather, Memento Tuxedo Black

Accessories - Blue Adhesive-Backed Gems

Tools - Big Shot, Stitched Rectangles Dies, Multipurpose Liquid Glue, Mini Stampin' Dimensionals, Paper Snips

Friday, January 15, 2021

Card of the Day - Painted Poppies

 Hello and welcome back! I'm trying to keep up with my birthday challenge again so I've got another birthday card today.


I decided to pull out this stamp set since I hadn't used it yet. I love these little poppies. They weren't too hard to color in with Stampin' Blends. I added the Mossy Meadow braided linen trim to ground them on the scalloped label.


The Tasteful Textile embossing folder adds just enough texture to the background.

This design was inspired by the sketch at Freshly Made Sketches.


Thanks for stopping by, and have a great day!

--Cindi


Supplies used (all Stampin' Up!):

Stamp sets - Painted Poppies, Itty Bitty Birthdays, Peaceful Moments

Paper - Whisper White Thick Cardstock; Calypso Coral and Whisper White cardstock; Peaceful Poppies DSP

Ink/Coloring Tools - Memento Tuxedo Black, Calypso Coral; Stampin' Blends: Poppy Parade Dark and Light

Accessories - Mossy Meadow 1/8" Braided Linen Trim

Tools - Big Shot, Stitched So Sweetly Dies, Tasteful Textile 3D Embossing Folder, Multipurpose Liquid Glue, Stampin' Dimensionals, Mini Glue Dots

Thursday, January 14, 2021

Card of the Day - Sunflower Shutter Birthday

 Hello and welcome back! I have a couple of friends celebrating "I just signed up for Medicare" birthdays this month, so a special card is in order.


I've been wanting to try a shutter card, and I found a really good tutorial on Lisa Curcio's blog. There's a video and she gives all the measurements, along with some great tips. You can find it HERE.


There was one thing that I don't think she mentioned, so I'll do it here. Make sure when you cut the circle in the inside panel that it is closer to the center top to bottom. I put mine too close to the top and when I added the dimensionals, the shutter couldn't line up correctly. I ended up using a foam adhesive strip so that I would have a little more space. The benefit is that the strips are a little thicker than dimensionals so there is more room for the shutter to work.

A bonus is that this design is perfect for the sketch challenge at TGIF this week, and I pulled the colors from this week's challenge at the Paper Players.


Thanks for stopping by, and have a great day!

--Cindi


Supplies used (all Stampin' Up!):

Stamp sets - Celebrate Sunflowers, Band Together, Dragonfly Garden

Paper - Misty Moonlight, Bumblebee, Blackberry Bliss, and Whisper White cardstock; Dandy Garden DSP

Ink - Bumblebee, Blackberry Bliss

Tools - Big Shot, Circles Collection Framelits, Layering Circles Framelits, Sunflower Dies, Multipurpose Liquid Glue, Stampin' Dimensionals, Foam Adhesive Strips, Tear & Tape

Saturday, January 9, 2021

Card of the Day - Balloon Adventures

Hello and welcome back! I'm usually excited for a new year, but I have a feeling it's going to be much like the old one. Well, we'll just keep plugging away until things are back to "normal."

Here's today's card:

After sending 255 birthday cards last year, I'm going to try and keep up the pace. We'll see how it goes!

This was created with current cardstock but a retired stamp set and DSP. I was able to use a punch for the balloons and thought there was a die for the banner, but I was wrong. It was pretty easy to fussy cut.


This design was inspired by the color challenge at CAS Colours & Sketches and the sketch challenge at Paper Craft Crew.


Thanks for stopping by, and have a great day!

--Cindi


Supplies used (all Stampin' Up!):

Stamp set - Balloon Adventures

Paper - Whisper White Thick Cardstock; Whisper White, Cherry Cobbler, and Bermuda Bay cardstock; Picture Perfect Party DSP

Ink - Cherry Cobbler, Bermuda Bay

Accessories - Wonderful Gems

Tools - Big Shot, Elegant Dots Embossing Folder. Balloon Bouquet Punch, Stampin' Dimensionals, Multipurpose Liquid Glue